The theme for January quilt is - Just Borders. Its amazing to see what you can do with just adding borders to rectangles/triangles/hexagons/squares. I want to slowly build the piecing skill as part of the Boot Camp Sundays. So, this month we will just focus on adding borders/sashing to squares and rectangles.
Here are some fabric choices for this month:
 |
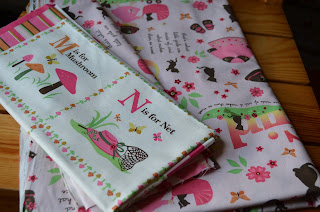
| Girl ABC Panel and Border fabric |
 |
| Spots Favorite Color Panel and border/binding fabrics |
 |
| Pre-cuts |
- Pre-printed Panels: These are amazing way to make baby quilts. You can find a variety of children panels. Some of them you can use as center of the quilts. Others, you can cut them into blocks and use as center of the blocks.
- Pre-cuts: There are quite a variety of pre-cuts from Fat Quarters, Fat eighth, Layer cakes(10" squares), charm packs (5" squares), Moda candy (2.5" squares). Also triangles are available called Turnovers and ofcourse my favorite Rolie Polies/Jelly Rolls(2.5" x 42/44 inch strips)
So, you can choose whether you want to work with yardages/panels or pre-cuts. Last year when I got it quilting as a beginner I found pre-cuts were awesome way to put the quilt together. Not only it saves you time, but eliminates the anxiety of cutting it precisely.
Tools Needed:
 |
| Tools |
- Rotary cutter - A good rotary cutter is essential to make your cutting easier. The standard size available is with 45mm blade. But there are rotary cutters with smaller(28mm) and larger blades this (60mm blade) too.
- Rotary cutting Mat: This is a self heating mat which is used along rotary cutter as the base while cutting fabrics.
- Good Ruler: Most often I find myself using the following two rulers
- 6.5 x 24.5 ruler - for cutting strips
- 12.5 x 12.5 ruler - for squaring up
- 1/4 inch quilting foot: This makes piecing so much easier. If you're following a particular pattern with measurements. This is a great tool to have. This even helps with piecing curves.
 |
| 1/4 Inch Quilting foot |
- Quilting quality Thread: I find this is a personal choice depending upon the look and feel you're going for your quilt. Almost try out different quilting threads to see what works best with your sewing machine. I personally like that my quilting is seen so prefer to use Sulky 40wt rayon thread which has a beautiful sheen to it and works well with my sewing machine. I also like the following threads:
- Superior Threads So Fine 50wt polyester thread
- Auriful 50wt cotton thread
- Coats and Clarks 30wt cotton threads (available at Joann Fabrics)
Instructions:
Cutting:
To add perfect straight border is to know how to cut strips.
How to cut the strips accurately without any curves?
 |
| 2.Fabric fold aligned with the line marking on the ruler |
- Unfold your fabric to make sure the fold line from the bolt is the correct center of the fabric. If not, press the fabric making sure the grain of the fabric to be straight in the center.
- Place the ruler on top of fabric which you're going to trim. Align the fold of the fabric with line marking on the ruler and not your cutting mat. Cutting mat can be used as a guide though. Then trim off the edges to start with clean edge.
- Now, turn the fabric to the other side, again repeat step 2. and cut the desired width of strip.
This technique will always guarantee your strips are straight and do not curve in the center.
Quilt Construction Option 1:
Trim your panel with 1/4inch seam allowance. For example if you want the panel to be 20 x 20 inch then your add 1/4 inch to all 4 sides. So, your panel should now measure 20.5 x 20.5 inches before sewing.
Cut the fabric strip for first border, below you will see that I have added a 2.5 inch strip. I am using Moda bella white jelly roll for first border.
 |
| Align the seam with the ruler and trim the extra fabric from the border |
 |
| Press the seams open |
Now cut another strip 6.5 inch by WOF(Width of Fabric usually 42/44 for quilting weight cotton).
Add this as the outer border.
The quilt top should now measure 36 x 36 inches.
 Quilt Construction Option 2:
- Riley Blake Dress-up Days Jelly Roll - 1
- Riley Blake Dress-up Days Charm pack - 1
- Moda Bella White Jelly Roll - 1
- Moda Bella White Charm pack - 1
The Riley Blakes Dress-up Days Jelly Roll and Charm pack 24 count fabric from the line. Pick the same number of Jelly Roll strips and Charm squares from the background/white fabric(I am using Moda Bella White).
Now you need to pair a print Jelly roll with a solid(Moda Bella White in my case) and a Solid Jelly Roll with a print charm square.
I like to press the seams open for this quilt. Now sew each row one by one using 1/4 inch seam allowance.
I am planning to use a layout of 6 x 8 ( 6 columns x 8 rows)).
 |
| 2 of the 8 rows |
Then add a border 3.5 inch. For this quilt I will be cutting the strips length wise. Add the border.
This quilt should approximately measure 60 x 70 inches.
Quilt Construction Option 3:
I made another quilt using panel and added two borders:
I hope you now have few ideas to make a quilt using this simple technique of adding borders/sashing.
I will back in couple of weeks with some quilting options for your quilt top.
Happy Quilting!
Malini


Great instructions!!! I'm sure I have some panels hiding out in my studio... I'll have to hunt them down and add some borders;-)
ReplyDelete